Prototyping Advanced Scroll Interactions in Framer X
How-to’s and what’s under the hood
Quick, how do you prototype a page with sticky headers like this in Framer X?
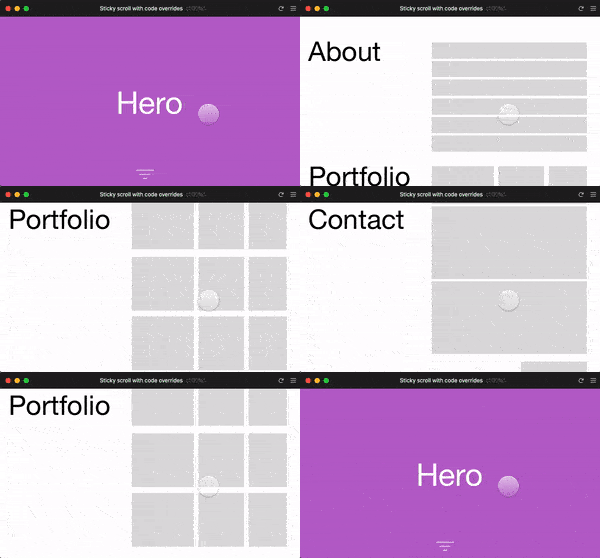
What about this one?

Or an SVG line tracing animation controlled by scrolling?
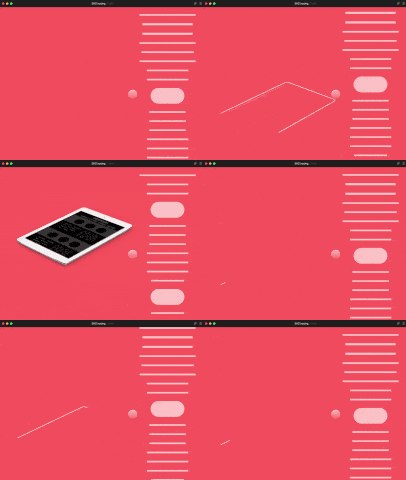
The short answer is: use Linton’s Parallax module. :)
I know, shameless plug! But would you say no to a completely free and open source toolkit that saves you a lot of time?
In this post, I’ll show you exactly how to build advanced scroll interactions like those above. But they are just seeds, really. The more important thing is that you’d be able to create your own interactions for your own prototypes. What’s more, I’ll explain how it works under the hood. That’d help you customize and extend the module — taking its power to the next level!
Are you ready?
Sticky Headers
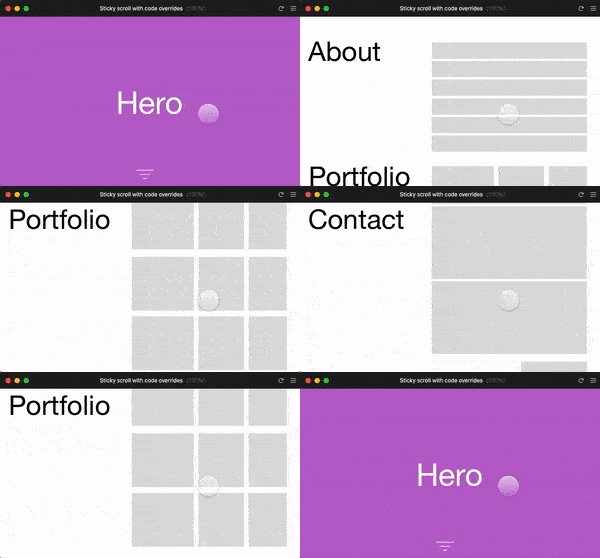
How do we make something “sticky” on a scrolling page? Moreover, these headers are only sticky when scrolling into a predefined range. If we scroll out of that range, the headers will be back to normal and move with the rest of the content. How do we build that?
Here are the steps:
- Install Parallax module
- Create a Scroll (yes, just the standard Scroll)
- Write some code overrides
- Assign the code overrides to the Scroll and the header that’s supposed to be sticky
- Pour yourself a glass of wine, enjoy!🍷
In fact, these are the steps for all the scroll interactions that we’re gonna build in this post. Of course, what makes the difference is step 2.
“Just don’t tell me that I need to write 200 lines of code!”
Relax! It’s easier than you think!
How about this:
const overrides = scrollOverrides( [0, 200], { id: 'about', op: sticky() } )Here, scrollOverrides is a function whose first parameter is the range and the second parameter defines the behavior. It literally tells us that we want the header about to be sticky when the scroll position is between 0 and 200, right?
Of course, we need to actually create the code overrides so that we could use them on the canvas:
export const Scroll: Override = props => overrides.scroll(props); export const About: Override = props => overrides.about(props);This might look a bit different than your typical onTap code overrides, but bear with me, I’ll explain the format soon.
Also, don’t forget to import the scrollOverrides and sticky functions:
import { scrollOverrides, sticky } from "@framer/lintonye.parallax/code/Parallax";Now, if we save the file, we’ll be able to see two code overrides Scroll and About. If we assign them to the Scroll and one of the headers respectively, it’ll actually work!
Just a few lines of code. Isn’t that nice?
Here’s the full code of the sticky headers gif at the beginning of this section. It’s no secret, we just use the same pattern a few more times to cover all the headers.
import { Override } from "framer";
import {
  scrollOverrides,
  sticky
} from "@framer/lintonye.parallax/code/Parallax";const titleHeight = 81;
const overrides = scrollOverrides(
  [422, 696 - titleHeight],
  { id: "about", op: sticky() },
  [696, 1136 - titleHeight],
  { id: "portfolio", op: sticky() },
  [1136, 1500 - titleHeight],
  { id: "contact", op: sticky() }
);export const Scroll: Override = props => overrides.scroll(props);
export const About: Override = props => overrides.about(props);
export const Portfolio: Override = props => overrides.portfolio(props);
export const Contact: Override = props => overrides.contact(props);
iPhone XR page
Let’s now look at this baby:

This prototype is definitely more complex than the last one. We’ll study the effects one at a time.
modulate
First, we see the block of text fades away as it’s scrolled up, as if it’s pushed away by the phone. How do we build that?
You’ll know it if you see the canvas:
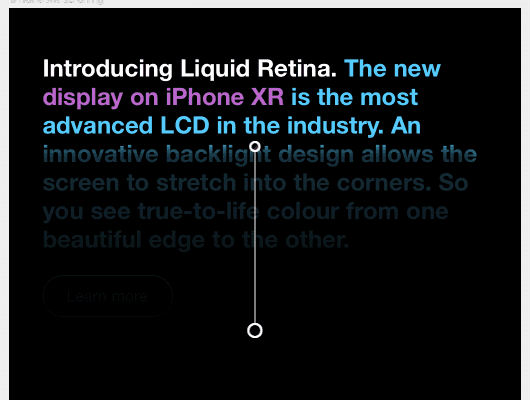
On the canvas, we have a frame with a gradient background that covers the text. On the preview, the opacity of this “cover” frame is initially set to 0. The opacity is gradually increased to 1 when scrolling up.
This is how to set the opacity according to the scroll position:
const overrides = scrollOverrides(
  [0, 200],
  { id: "cover", op: modulate("opacity", [0, 1]) }
  ...
)
Right! it’s the same pattern as sticky. Scroll range first, and then the behavior when scrolling into this range. Here, modulate is conceptually similar to Utils.modulate in Framer Classic. It converts the scroll position into an opacity value between 0 and 1.
speed
Now let’s switch our focus to the phone frame. If we look at it closely, we’ll see that the phone moves faster than the rest of the page. This creates the effect that it’s popping out from the bottom.

You guessed right, we have a function to control the speed too! Unsurprisingly, it’s called speed:
[100, 350],
{ id: "iPhoneXR", op: speed(2) }
The parameter of speed is the speed ratio relative to the rest of the page. We have number 2 here, it means the phone will move twice as fast. If we have number 0, it’ll be just normal scroll. Question, what is it gonna look like if we use speed(-1)? Try it out!
By the way, did you notice that there’s some zooming effect when the phone is moving up? Can you guess how to build it?
modulate, right?
[300, 750],
{ id: "iPhoneXR", op: modulate("scale", [1.5, 1]) }
Play custom animations
So far, we have modulate and speed which are both closely tied to the scroll position. If the page scroll a little bit, the values change a little bit. If the page does not scroll, the values won’t change. This works great, but sometimes we just want to trigger an animation when the page scrolls into a range. Even when we are NOT scrolling anymore, the animation should keep playing.
The label to the left of the iPhone works like below. Note even when I stopped scrolling (the phone stopped zooming in), the animation continued until the label disappeared.
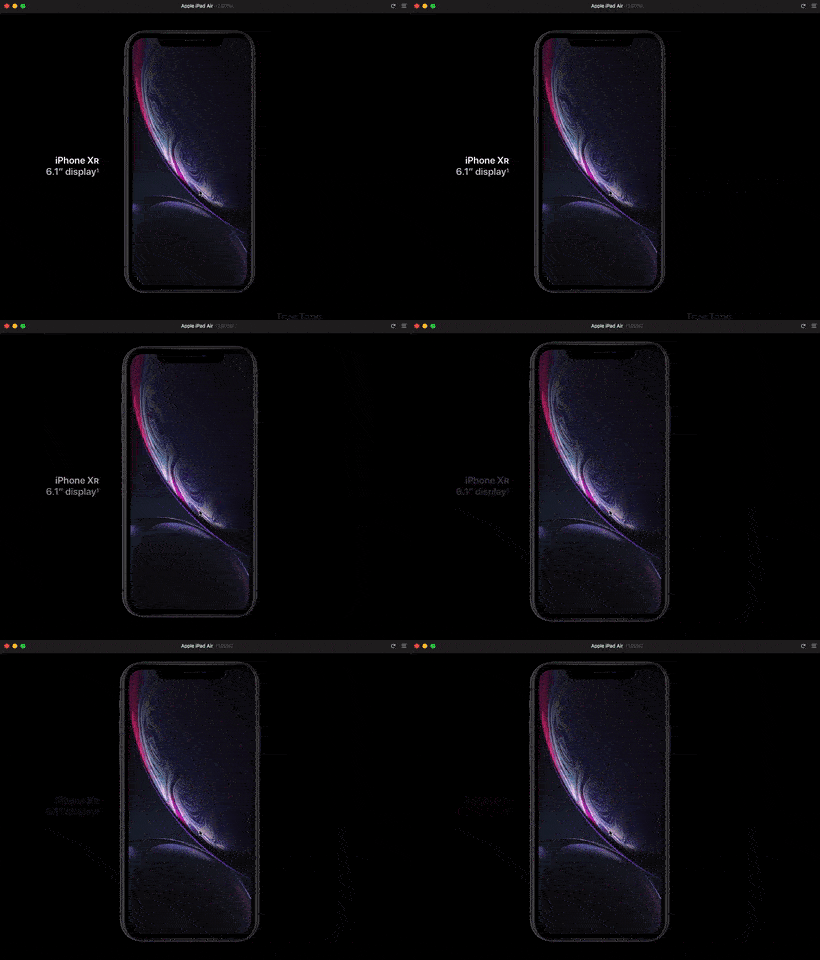
We can build it this way:
  [750, 800],
  {
    op: _ => ({ vy }) => {
      animate.ease(data.phoneNameSizeOpacity, vy > 0 ? 1 : 0, {
        duration: 0.2
      });
    }
  }
The highlighted code above runs when the page is scrolled into the given range. Note, it only runs once if we keep scrolling in the same direction.
Here, data.phoneNameSizeOpacity is defined in the same code override file just as what we are used to:
const data = Data({ phoneNameSizeOpacity: Animatable(0) });For data.phoneNameSizeOpacity to work, it is assigned to a code override. But there’s a little trick here that I’ll explain in a later section.
Also, vy is the velocity of the scrolling in the vertical axis. If it’s a positive number, the page is scrolling up. If it’s negative, the page is scrolling down. We use vy to play a different animation according to the scroll direction.
Finally, don’t forget the _ => in the front. You’ll get an error if you do!
Alright, that’s the iPhone XR prototype! There’re not much more surprises in the rest of it — just the same pattern being reused and combined. Check out the demo file for the complete source code.
SVG line tracing
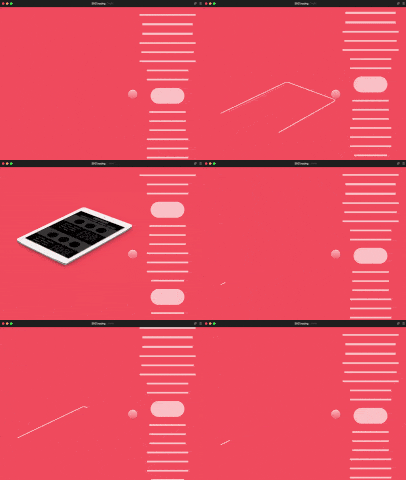
This line tracing effect looks rad, right? How do we build it?
In fact, I’ve got a IPadSvg code component that does most of the heavy-lifting. It exposes a progress prop that we can use to control how much the tracing has been done:
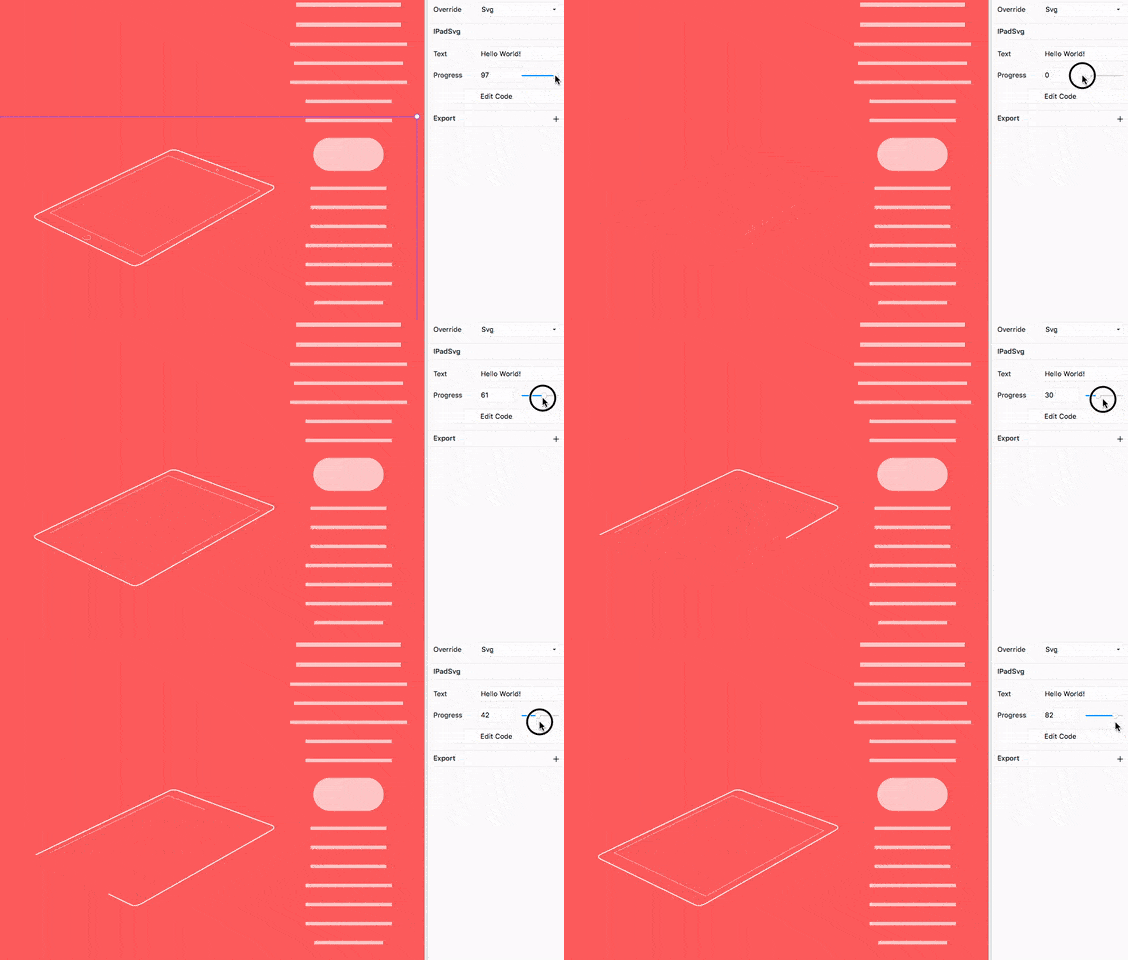
Since SVG line tracing is not the focus of this post, check out this article and the source code of IPadSvg for more details.
To integrate it with the scroll, we can do this:
  [0, 200],
  {
    op: _ => ({ y }) => {
      data.traceProgress = Math.floor((Math.abs(y) / 200) * 100);
      return true;
    }
  }
Yup, we use the same way as what I’ve explained in the “play custom animations” section above. One exception is that we are returning true in this function. What’s the deal?
Remember? The function only runs once when the page scrolls into the range. But for this prototype to work, we need to continually convert the scroll position into a progress value. Returning true here makes sure that the function will run again in the next round.
Of course, don’t forget to create a code override and assign it to the component on the canvas:
export const Svg: Override = () => ({ progress: data.traceProgress });Under the hood
Until this point, if you are not satisfied with the “magic” of the Parallax module and start wondering how this stuff works, Kudos! That’s a great mindset to have!
I know, perhaps your goal is not to write a Parallax module of your own. Perhaps you just want to build a prototype that rocks. However, don’t you want to be the master of your tools? Then you’d better understand how they work!
What’s that overrides?
Let’s start with this:
export const Scroll: Override = props => overrides.scroll(props);It’s a Framer X code override, right? But normally we write code overrides this way:
export const Scale: Override = () => {
  return {
    onTap() {
      ...
    }
  }
}
What’s it? It’s an arrow function that returns an object, right? We can rewrite our Scroll override like this:
export const Scroll: Override = props => {
  return overrides.scroll(props);
}
Compare the two code snippets above. What did you find?
This means overrides.scroll is a function that returns an object. In fact, we can print out the result in the console and check out what’s actually there.
export const Scroll: Override = props => {
  const result = overrides.scroll(props);
  console.log(result);
  return result;
}
Hmm, looks like it’s just an object that contains an onMove function? Exactly! This is how we monitor the scroll position!
Similarly, if we print out the result of this override:
export const About: Override = props => overrides.about(props);We’ll get:

This time, we create an object that has a top Animatable and a bottom with null value. They override the original top and bottom — this is how sticky works! (BTW: guess what left and right are for?)
In fact, we can write the Scroll and About overrides this way:
const data = Data({ aboutTop: Animatable(0) });
export const Scroll: Override = props => {
  return {
    onMove({y}) {
      if (in the range) {
        data.aboutTop.set(-y + initialY) // this is why it's sticky!
      }
    }
  };
}
export const About: Override = props => {
  return {
    top: data.aboutTop,
    ...
  };
}
This looks more familiar, doesn’t it?
speed is a similar story. In fact, sticky is just speed(-1)! If you don’t believe it, check out the code. For modulate, there’s an additional field in the override object depending on the parameter we use. For example, if we call modulate('opacity', [0, 1]), we’ll have opacity: data.opacity.
scrollOverrides manages all these override objects, merges and organizes them by id. That’s why we have overrides.scroll, overrides.about, overrides.iPhoneXR etc. Each of them is a function that returns an override object.
That’s pretty much how it works! With the Parallax module, all we need to do is to define the scrolling behavior, and call overrides.scroll(props) or overrides.about(props) and so on, the rest of the grunt work is handled by the module.
Merge overrides
Armed with the knowledge that overrides.scroll(props) just returns an override object, we can get back to our earlier discussion about data.phoneNameSizeOpacity.
We want to start a custom animation that fades in/out the label when the page scrolls into a range. So we have:
  [750, 800],
  {
    op: _ => ({ vy }) => {
      animate.ease(data.phoneNameSizeOpacity, vy > 0 ? 1 : 0, {
        duration: 0.2
      });
    }
  }
However, this just animates the data.phoneNameSizeOpacity. For it to have any effect on the preview, we’d need to create a code override and assign it to the label on the canvas.
export const PhoneNameSize: Override = props => ({
  opacity: data.phoneNameSizeOpacity
});
But the problem is, we defined another scrolling behavior that make the label sticky:
  [500, 1050],
  [
    { id: "phoneNameSize", op: sticky() }
  ],
This requires the creation of a code override too!
export const PhoneNameSize: Override = props => overrides.phoneNameSize(props)How do we make both of them work?
Remind you, what’s the return value of overrides.phoneNameSize(props)? It’s just an object, right?
So, we can just merge them in the way how we merge two objects:
export const PhoneNameSize: Override = props => ({
  ...overrides.phoneNameSize(props),
  opacity: data.phoneNameSizeOpacity
});
This is the power of knowing what’s under the hood!
Access internal Animatable
Here’s another example. Let’s say we have a Scroll that “snaps to” a given range. We also want to have navigation buttons that scroll to a location on the page.
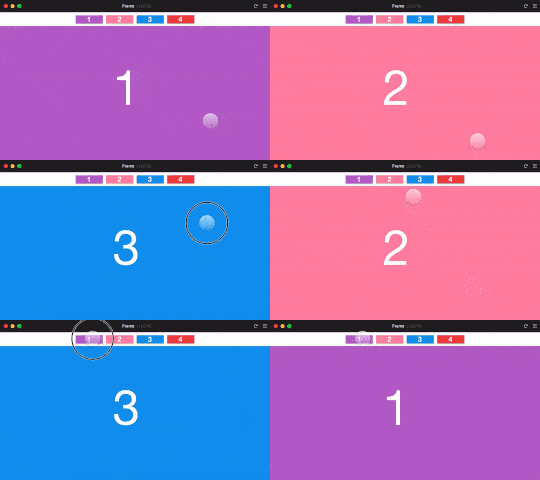
The snapping behavior can be implemented with the snap function in Parallax:
const overrides = scrollOverrides(
  [0, 200],
  { op: snap() }
);
export const Scroll: Override = props => overrides.scroll(props);
It works by overriding the contentOffsetY prop of Scroll and animate the value based on the specified scroll range.
However, how do we build the navigation buttons? If we want to scroll to a position on the page, don’t we need to update contentOffsetY too? This means that we can’t simply create a data item to override the contentOffsetY of the Scroll.
We can’t merge the overrides like the last section either:
export const Scroll: Override = props => ({
  ...overrides.scroll(props),
  contentOffsetY: data.contentOffsetY
});
In this case, the snapping behavior will stop working because the contentOffsetY is overwritten by contentOffsetY: data.contentOffsetY.
How do we support both? The answer is in the last section as well: overrides.scroll(props) returns an object, which already has a contentOffsetY Animatable. Why don’t we just use that value for navigation?
let scrollContentOffsetY;export Scroll: Override = props => {
  const scrollOverride = overrides.scroll(props);
  scrollContentOffsetY = scrollOverride.contentOffsetY;
  return scrollOverride;
}
export NavButton: Override = () => ({
  onTap() {
    animate.ease(scrollContentOffsetY, -500, { duration: 0.3 });
  }
})
Extension opportunities
If you dig deeper, you’d find other opportunities to use Parallax. For example, did you notice that there is a scrollAwayHeader function that’s built upon scrollOverrides?
What about writing a new “op” function that’s similar to sticky, speed or modulate? This would definitely be more involved, but what prevents you from reading the source code and learning how to do it?
Conclusion
Alright, so this is how to prototype advanced, range-based scroll interactions in Framer X. I wrote the Parallax module to help you build great stuff with less time and effort. And I couldn’t help writing a bunch of words here about how it works behind the scene, because I believe knowing your tools from inside out really goes a long way.
Get the Parallax module! Share with me what you create. I’ll be manically refreshing Twitter waiting to see it! 😍
Check out my Framer X and React courses tailored for designers just like you!

