Virtual facilitation: from side skill to recurring practice.

This post is a follow-up piece to my initial article on the topic.
If life can drastically change in a snap of a finger, imagine how many things can happen in half a year! The last time I wrote about it, Virtual Facilitation was to me an intriguing speculative field I knew it made sense for me to deep dive more into. As a passionate facilitator in a world of increasingly on-trend remote dynamics, I saw potential in exploring the subject hands-on and I felt eager at making it one of my future-proof skills in my pocket.
Advocated by my Thought Leadership, I enhanced the blooming of a specialised core team of virtual facilitators within the company, now dedicated to serving our clients with our associated offering. We tirelessly and collaboratively crafted the best way to shift our face to face in-depth facilitation expertise into the online environment for optimal results. We set up a wide Mural library of custom templates & favourite exercises to use in our sessions, and we now regularly deliver virtual workshops to amazing clients.
But which takeaways have I collected meanwhile embedding Virtual Facilitation as a steady asset in my practice? What have I learned during these exciting times?
This article aims at sharing additional insights into the pragmatic dynamics of running remote workshops and co-creative sessions. It’ll hopefully complement, enrich, and build upon the picture I drew in my previous article on the matter to trigger your personal adaptations and make YOUR remote sessions truly awesome. Let’s start!
1. Tools: beyond the buzz that comes and goes. ⚒️
It is true, some tools are better than others. As it is true that cool features like the voting and timer options in Mural, playful polls in Mentimeter, or the Breakout room possibility in Zoom help to quickly inject seamless engagement into a remote session, easily. But what do you do when you don’t have all your dream tools at your disposal? Let’s look at a personal example.

I really like Zoom, it is my favourite video conference tool so far. It provides solid performance in combination with plenty of nice micro features: the gallery view perfect for energisers, the annotate option, the interactive feedback loop feature for large audience sessions, to mention (just) some. BUT, reality wants my company’s favourite tool is Microsoft Teams instead, which I am not exactly a fan of. So, what would a designer do?

We got proactive and looked for hacks to create our workarounds. We turned annoying constraints into creative triggers and managed, for example, to craft a Breakout-room-alike experience in Microsoft Teams too, for us to be able to achieve our intended session dynamics and facilitation goals. Instead of clicking one button, the flow in Teams requires a little more preparation, but after the first setup, effort gets minimised and it ultimately works quite well. What I’d like to get across with this example is that there’s hardly a perfect recipe available, and hardly one available forever.
Things change, all the time. Some love Mural, some others prefer Miro and equal comparisons can be done for pretty much any tool, falling into a vicious cycle. Don’t get caught up by the buzz around tools: they should serve your purpose, not driving you crazy. Look at practical ways and alternatives to make it work for yourself in the best way possible: don’t feel ashamed if you opt for Google slides or PowerPoint, as long as you can manage to get from A to B and provide value with your session, that’s all that really matters.
It’s in your attitude, your agenda design, your ability to get across purposeful outcomes despite adversities where true success ultimately lies. Tools alone won’t get you far.
2. The power of Micro Interactions. 💬
One thing that equally fascinated and threatened me the most about Virtual Facilitation was participants’ engagement. How do you keep it alive? How do you monitor it through a screen? I then discovered over time that there are actually several ways to remotely engage participants successfully, all falling into the two main interactions types below.
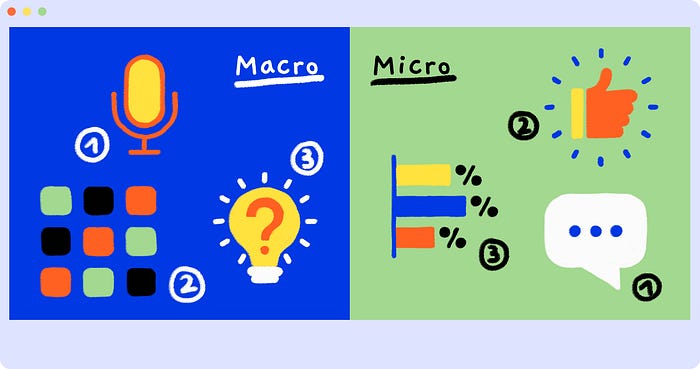
Macro Interactions: engagement type that involves full attention and medium-high effort from participants. Example: speaking with your mic on to explain a concept just created; executing a group energiser in gallery view; discussing and problem-solving in a breakout room.
Micro Interactions: engagement type that requires small effort from participants, often concentrated in a very limited amount of time. Example: sending input/emojis via chat; hand signals via camera; a Mentimeter poll.
In particular, I would like to draw attention to the Micro interactions via chat, as — in my view — they are an extremely powerful and game-changing asset for a facilitator to leverage during remote sessions. A plus to face-to-face ones even! Let me show you what I mean by that. Imagine that you’d like to do a temperature check mid-way throughout the session.
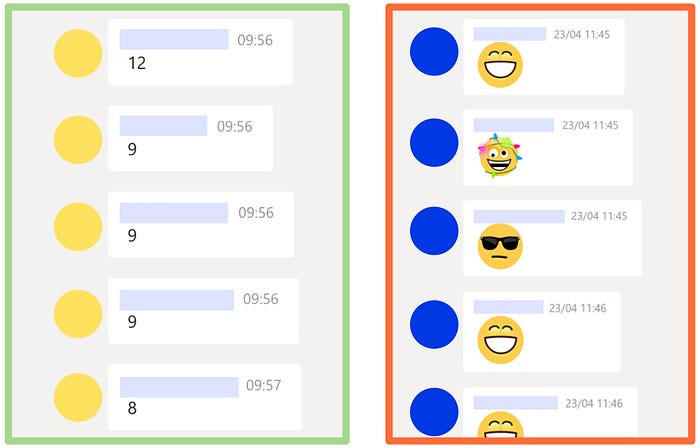
A handy way to do so by leveraging the chat is to ask ‘How do you feel from 1 to 10? Type your score.’ This way, in just a few seconds you’ll have a full overview of your participants’ energy levels and you’ll be able to spot the ones feeling a bit low, at a glance. Effective and time management friendly!
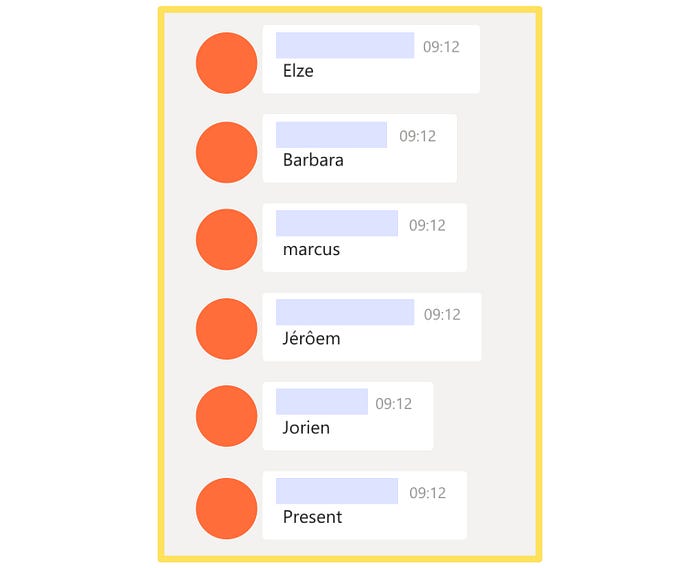
Let’s focus now on the break scenario. Often participants turn their camera off, go refill their cup of tea, and even if you agreed upon a specific time for them to be back, it might be tricky to know exactly when everyone is ready to move on.
So what you can do is to ask your participants ‘Hey, please write your names in the chat as soon as back from the break’. This way you’ll really know when to kick-off the next part, with greater confidence.
In a nutshell, take advantage of ‘controlled interactions’ via chat when planning the engagement strategy of your sessions: let participants feel heard while making sure you stay in control of time (i.e. You can decide to read all the comments out loud vs just a few standing out & move on).
More online engagement tips:
- Alternate content delivery/presentations and interactions by sticking to a good rhythm (make a switch every 15 mins ideally);
- Every member should be heard via mic at least once, even just for a small contribution. To help you remember whom to pick, write down the list of participants’ names on your sketchbook to make sure you turn-take effectively and call to attention EVERY member before the end;
- Be the energy you’d like your participants to feel! Use voice as your main asset to keep attention high. Do use a confident tone of voice and avoid monotone and slow pace style. Be fearless to over-communicate, participants get distracted very easily online.
3. Agenda design: offline vs online adaptation. 🔌
If you are an expert facilitator or can rely on some face-to-face facilitation practice, you’ll find yourself in the position to tweak your offline experience and approach to fit the online set-up. Below I extracted the key adaptation points I think it’s worth paying attention to when embracing the switch.
Activities:
- Work on anticipation. For example, if your goal is to co-create a User Journey or a Road Map, prepare a draft to discuss and refine together rather than a blank canvas to fill in from scratch within the session.
- Delegate tasks to participants (and clients). For example, they could take on a nice ice-breaker to facilitate as check-in or a fun way to conduct a retrospective as check-out. Don’t be scared to ask and get them involved!
- Assign pre-session assignments to make sure participants get eased into the tools and can familiarise with them prior to the session. Do not take for granted that participants can immediately juggle them well: some warm-up time alone really helps to give them the confidence they might need for a smooth collaboration later. Here are some examples:


- Assign post-session homework to maximise time and make an effective split between group activities (must do online together) vs consolidation time (individual, offline).
- Schedule breaks, many and often! Rule of thumb is 10 mins every hour and leaving 1 full hour off for lunch. Give participants the chance to stretch their legs, it’ll benefit their focus once back.
Timing:
- Go for targeted, compact activities that truly matter rather than longer exercises where the focus gets lost: attention span online tends to be shorter, it takes a lot of brainpower to interact remotely. Put an effort to plan the session duration as crispy as you can! Tip: encourage a series of multiple, shorter engagements rather than full days agendas.
- Schedule more time for preparation as you’ll need to engineer and accurately think through every single interaction that, if done face-to-face, you most likely would have played by ear. Less guessing and more over-preparing. Way more things can go wrong when dealing with remote sessions (you’ll see what I mean in one of the points below).
- Plan extra time as a safety margin for potential tech hiccups. In case one or more participants drop off the call and you’ll need to bring them up to speed or if YOU yourself will face tech bumps along the road.
4. Things can go wrong: get yourself a Plan B. 💥

What do you do if your go-to software is under maintenance exactly when you are supposed to run a workshop with it?
It might sound catastrophic and way too pessimistic but it is what happened to me. Mural was under maintenance and this pop-up was the only thing I could get out of it.
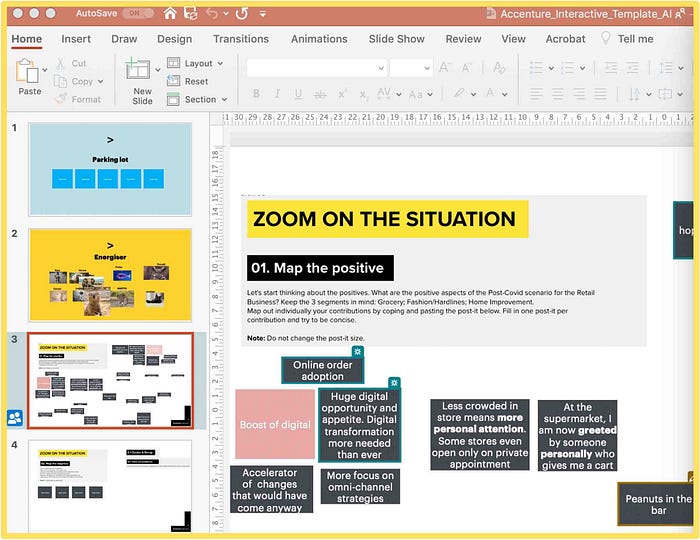
We still managed to complete all the exercises we aimed to cover, though I realised how important it is to have a plan B (at least in your mind) and a co-facilitator to help you transform adversities into a working solution. We used PowerPoint for participants to work collaboratively in realtime via Onedrive.
It worked. Not pretty, surely disappointed I couldn’t use the Mural board I spent quite some time designing, but hey, we got there! So, very important:
- Get yourself a co-facilitator. Troubleshooting gets easier to handle, and you can have someone monitoring the chat ready to support or an extra pair of eyes to check on each breakout room’s progress. Having two different leading voices and personalities alternating the facilitation load creates a dynamic and lively vibe.
- Think about alternatives ahead of time: even just thinking about it will prevent you from going blank and panic in case things don’t go as planned. Talk about negative scenarios as a team: in case the facilitator drops off the call for example, who will pick it up and carry on? Agree upon basic rules to clarify what to do and you’ll be fine.
5. Ideation: do not forget analogue means. ✏️

Caught up in our digital bubbles, at times we forget that we are still part of a physical, analogue world and that it can be leveraged during remote workshops. So far, when dealing with ideation sessions myself, the analogue way appeared to me to be the most solid and best-received approach, no matter the tech-savviness of the group. I usually ask participants beforehand to gather pen and paper next to their work station so that they can ideate and sketch in the ‘traditional way’, individually, and then upload a picture of their outcome by placing it on the dedicated spot of the board. This is one way.
Another way, especially for the ones struggling to produce a visual output of their ideas, is to leverage ONLY the items you have within the Whiteboard itself, such as stickers, images, shapes, arrows. You can search and place them in no time without going elsewhere and it lowers down the pressure of generating something out of the box. Test this alternative as well.
Tip: When it’s time to vote for the most promising idea(s), I tend to prefer colored dots that participants can copy-paste where ideas belong, rather than in-whiteboard voting functionality. Why? The voting feature in Mural, for example, works very well in a post-its-only scenario where the items you need to vote on are all consistent. In case of ideation though, in my experience, you can get a quite scattered battlefield made out of images, post-its, icons and that often can result in misplaced votes and in empty spots appearing in the results preview, generating confusion for both participants and facilitators.

6. Yes, more energisers! ⚡
Here are some more check-in ideas I recommend, in addition to the ones mentioned in my previous article. Energisers are never enough, really!
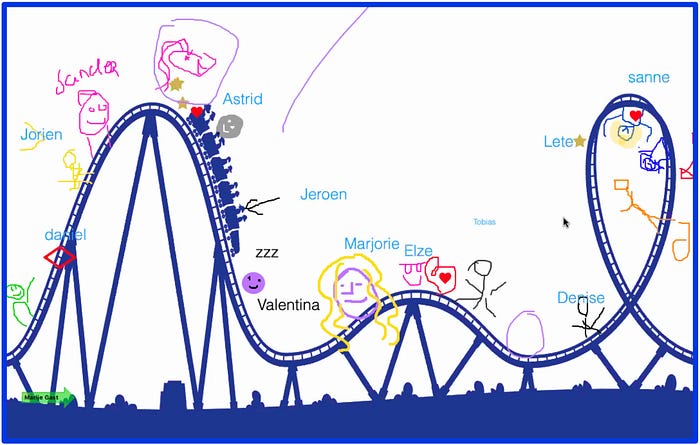
Rollercoaster 🎢
Want to do a temperature check of your team before kick-starting your session? Draw a wavy line on your whiteboard or, even better, get yourself a picture of a rollercoaster to make it more realistic. Then ask each participant to draw himself/herself at different points on the rollercoaster depending on how they are feeling. After 3 mins of sketching and reflecting, start a round table — either one-by-one or at random — to discuss groups’ emotional temperature. It is a playful, handy visual way to uncover any potential needs, frustrations, and concerns within the team.
Colour quest 🌈
What about some action in combination with the physical space around you? You’ll get amazed by the result. This easy check-in starts with the facilitator picking one colour and giving participants 2 min time to find a physical object in their environment matching that colour. The first one coming back gets a point as well as the participant bringing back the weirdest object. You can play a couple of rounds and include any symbolic intangible prize to spicy it up (i.e. Winners can choose a funny move everyone has to mimic).
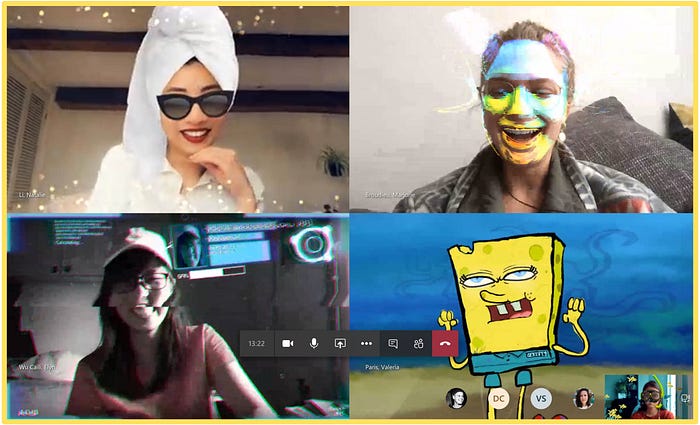
Moody Background 👩💻
Video-call backgrounds and filters. There are so many out there and so many different preferences and ways to use them. Well, let’s make them an integral part of the check-in moment, to help you show how you feel and what your mood is! For this one, I suggest you use Snap Camera. Make sure your participants have all installed it before the call and give them 2 mins to individually pick one background/filter style best representing how they feel. Do then a round table to explore the reasons. It’ll be fun, I promise!
Tscheck 🎈
What about a random generator of interesting questions to get participants to open up a bit about themselves? Check out this tool, it’ll easily become your safe go-to energiser for pretty much any workshop (or meeting).
To wrap up…
As a facilitator, you might miss the feeling of writing post-its and having a laugh with your participants face to face as you used to, or maybe you’ll just make of remote co-creation your “new normal”. Whatever your preference might be and whatever the post-pandemic tomorrow will hold for us, it’s good to have a choice, to evaluate alternatives, and be open-minded towards new ways of working.
“I’ve never done that before, so I’m sure I can do it.”
Pippi Longstocking
This quote I’ve been reminded of perfectly captures the importance of self-building an adaptable, change-friendly, and optimistic mindset towards new dynamics. Tools will keep on changing, new disruptions will keep on coming, so let’s focus on the way that WE react and respond to them. As long as you’ll think and act with a constructive attitude and growth mindset, anything new, like remote co-creation, can be learned and smashed.
And you, what’s in your mind about Virtual Facilitation? Are you gradually getting into it or at an experienced stage? Curious to know whether my learnings resonated well with you! 🙋🏻
In case you are struggling with Remote Collaboration and Remote Design Processes these days, do check out this Webinar by LadiesThatUX-AMS where I spoke at together with Huī Lín: it collects many handy insights and tips!👇
Thanks for reading! 💛 If you have feedback to share, feel free to say hello 👋🏽


